Tuesday, December 13, 2016

Battletech - preparing for an intro level game

Hi everyone,

We're going to have a session of Battletech this weekend.  What's cool is that we're going to play with a group of friends who generally only play RPG games such as Pathfinder.  So, this is our chance to show-off how fun one of our favorite games, Battletech, can be.

Here's our plan:

- Forces:

Planning to run the session with one of us acting as a "Game Master"; and the other of us acting a bit as a "Lance Leader".  Sounds like we'll have 6 friendly mechs going up against 6 enemy mechs.

And, here's a little bit of how far we've come in the two or so years we've been playing and modeling.  We took some of the models (like the Dragon mech) and stripped off the older, more primitive paint job; and added in some new models; and then created the enemy force below.  Also showing an image of one of our old paint jobs for comparison.  Believe this is proof that improvement is possible!!!

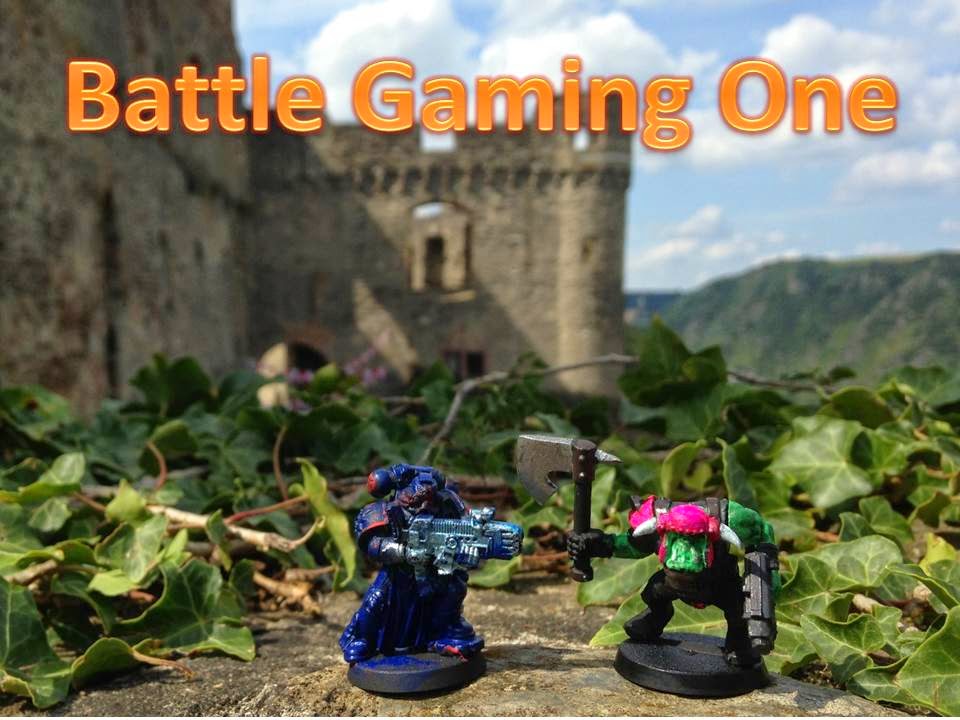
When we first got our starter-box full of mechs, we went to work painting them.  Here's how we did back in July of 2014.

And, here we are in December, 2016.  Learned a lot about painting between now and then!!!  Still have some work to do on the bases.  But, what a difference with practice, practice, practice.  And, of course, still lots of fun room for improvement :)

And, thinking that we'd like the experience to be positive - so going to give the players an advantage of about 20% or so in tonnage.  Likely it'll be 360 tons vs. 300 tons.

Since these players are coming from an RPG type of world, thinking of giving them a choice like this one:

- Default - you get a Heavy mech.  And, you get Gunnary and Piloting of 5's
- Option - you select a Medium mech.  Then, you get 4's.
- Option - you select a Light mech.  Then, you get 3's.
- Option - you want the firepower and armor of an Assault mech?  Then, you get 6's.

Going to have the "bad guys" all have 5's -- though toying with giving the lance leader 4's to create an incentive for the players to find a way to take that "bad" mech out of commission.

Oh - and one other simplification.  Playing with pre-clan mech's.  So, strictly old-school in terms of lasers, PPCs and auto-cannons.

- Scenario:

Thinking that we'll probably go with something like "the rag-tag rebels need to kick House [blank] out of the city."

Since the "bad guys" have nice, new paint jobs - and very likely that the players will have paint schemes which won't match, hoping that this feels real to everyone.

- Table top:

For the table-top, thinking to use 3 standard fold-up maps.

But, want to spice it up with a first try of 3D pieces added onto those maps.

To create the 3D pieces, here's what we've done:
1.  Got some very inexpensive old Battletech maps on eBay.

Cutting out the "Level 1" and "Level 2" sections of this map.

2.  Cut out the raised portions with Xacto knife.  [Warning - the older edition Level 1 / Level 2 / Etc., markings aren't quite the same as the new ones.  So, you have to look closely at what you're doing.]

Here is one section - carefully cut-out with scissors and X-acto.  Cut the Level 1 portion apart from the Level 2 portion....

3.  Cut out 1" pink foam with the mini-band-saw to match the paper maps.

Here we are at work with the mini-band-saw on the pink foam....

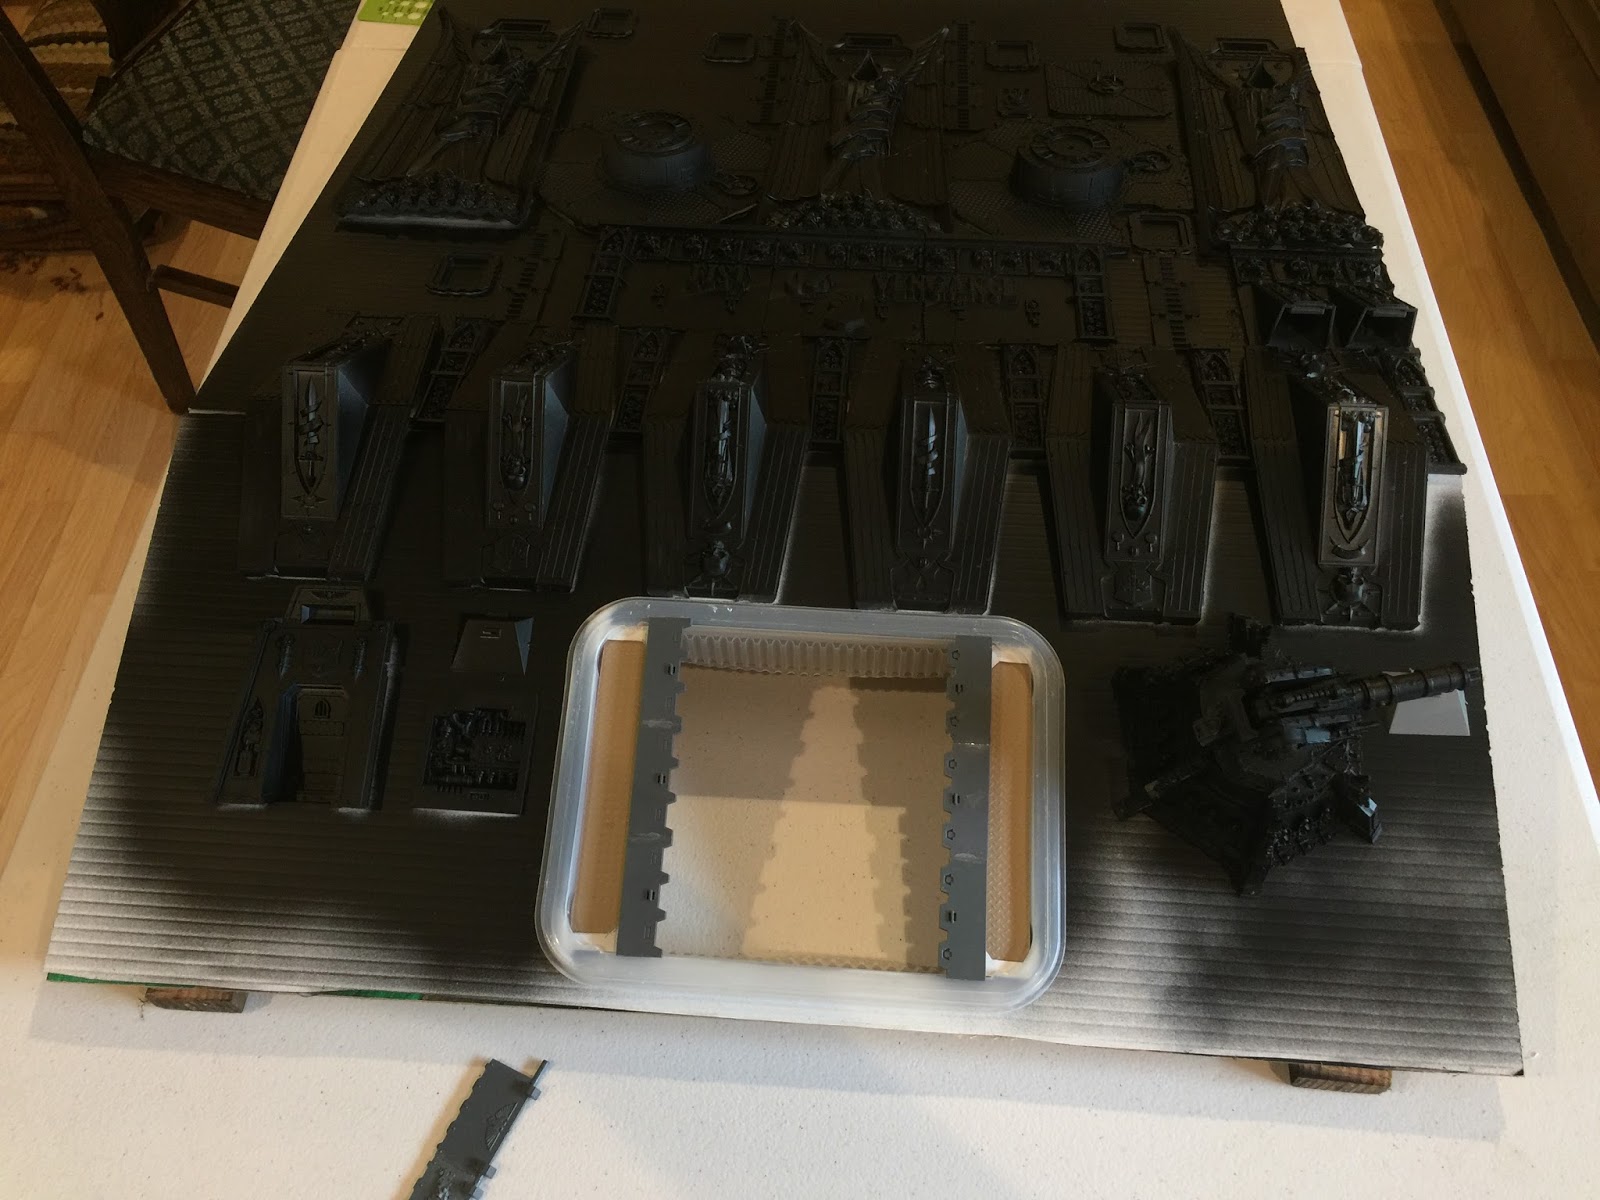
And, a test fit-up of our paper cut-outs and pink foam on the terrain....


One more test fit-up with the Level 2 and Level 3 pink foam added....

4.  Painted the pink foam with the same tones as the paper cut-outs.  Used brown house paint for this - then did "dry brushing" with a sponge to add some lighter colors and texture.

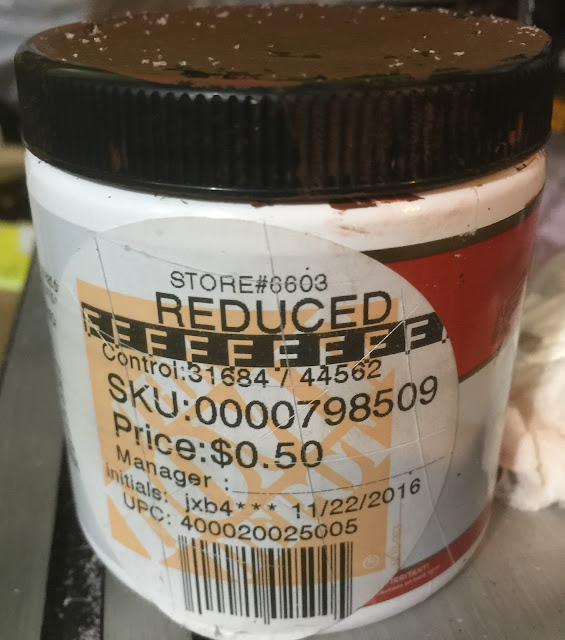
Why buy new paint when you can get nice colors (like this dirt-colored brown) at Home Depot for $0.50!!  Somebody got a sample and then didn't want it.  We can use it :)

 Here's how the pink foam looked after a layer of brown and then a bit of dry-brushing with sponge to lighten up with lighter brown and tan colors.


5.  Then, going to use Mod-Podge to glue the maps to the pink foam.

Here we are in the middle of the Mod Podge process.  It was a little bit scary because it's not clear when you first paint it on.  But, it does dry as clear!

Here is our terrain - in ready-to-go condition :)


6.  Lastly, going to place little magnets on the under-side -- and embedded into the board so that the foam stays put :)


- Rules:

We're going to try to use most of the rules -- believe we can explain them to new people pretty quickly.

The biggest challenge for us is always torso twists.  What we've done before is to simply hand-wave torso twists and to say that in the firing phase a player can always twist however they'd like.  Know that this isn't really proper - but it has simplified things when we have lots of mechs on the board (and in this battle there'll be 12!!)

Then, going to use the idea of writing moves onto sheets to help everyone keep track.  This has worked well for us in the past - and don't have to worry about dice (marking the type of move and number of hexes) getting lost.  [Here's a link to our blog write-up about that.]


Thursday, November 17, 2016

Orks vs. Eldar - Big Mek Stompa Takes on an Old Foe

Hi everyone,

We recently had a chance to play a very fun game against our friend Mr. S.

Some key background items here:
  1. We have not ever beaten Mr. S.  In fact, we've been on the fairly substantial end of a whipping the times we have played him.
  2. Mr. S. has some pretty powerful Eldar.  And, we've not been too good at tackling those D-1 weapons and all of the fancy-dancy movement his Eldar can do.
  3. Mr. S. is an extremely nice person - and has enjoyed Ork modeling - lots of fun to chat with about projects.
So, we did a little bit of thinking on how to give him a run for his money.  Here's what we came up with:
  1. Use the Necron-looted Big Mek Stompa we had built for Armies on Parade.  That way if he brings his really tall Eldar we can use the Lifta-Droppa on him!!
  2. Put Tank Bustas in the Big Mek Stompa.  That way they have some good armor.
  3. (Most Important) Strike a SYK-A-LOGIKUL (that's Psychological) Blow by bringing our Da Pain Train.  That lovely Looted Wagon is Supreme Warboss Fork's armies looting of Eldar technology - and sports a skewered Eldar pilot on the front  :)  :)  [Link to blog write-up about Da Pain Train]
Here is Fork's Big Mek Stompa.  We built the Lifta-Droppa out of parts we found washed up on the beach.  Used our green glowing stuff (Necron style) too.  Fork's Big Mek figurz this will keep the Eldar distrakted!!  Oh - and the Ork script on the side does say "Spork Suks".  The Rivalry continues....

Fork's Eldar Looted Train;Eldar Looting;Eldar Looted Wagon;Ork Train
 Here is Da Pain Train.  Skewered Eldar pilot right up front.  Lots of shiny Eldar blood for Mr. S's Eldars to look at and think about!  Da Pain Train is pulling a shield generator (why not?)

Here's how the battle shaped up....

We used the Mountain View Game Kastle's Normandy beach terrain.  We were the defenders - the Eldar were invading....

Eldar chanting; Eldar script
From the Warboss Log of Supreme Warboss Fork:  "Der waz sum weerd chant'in from dose Eldarz.  Figgured we wud attak anywayz."

The Eldar moved quickly to find positions of cover to shoot at the Ork vehicles.

As a set-back for the Orks, the Shield Generators effect on the Big Mek Stompa only granted one extra HP (rolled a 1 on the d6).


Eldar units moving quickly into cover to line up shoots against the Ork vehicles....

The Eldar quickly moved into positions of cover - and made a series of rapid runs against the Stompa.  Clearly their goal was to reach the weaker, rear armor.

However, while the Stompas big weapons pounded away, the Tank Busta crew cleaned up the Eldar units which did manage to get into the rear.

The tone of the battle began to shift.  Fork's boyz were shooting exceptionally well - and it did not appear to be the Eldar's day.

And, so in a move to save their fallen brother, the Eldar made a dash for Da Pain Train.  Successful in crashing the Ork vehicle, they almost managed to save the pilot "figurehead."

Eldar units mounting a rescue for the skewed pilot.  The Ork's looted vehicle is disabled.  This is their chance!

But, alas for the Eldar, the Stompa rounded on the rescuers and dispatched the lead units.

The lead units are wiped off the battlefield by the Stompa.  The Eldar pilot is not rescued....

And, with that, the Eldar retreated from the field.  Clearly seeing the long view of their fight with the Orks.  This battle wasn't crucial for them -- better to build their strength and fight again on a more auspicious day.

None of this made sense to Fork and his Boyz.  None of it mattered either.  There was looting to do on the battlefield!!! 

Tuesday, November 15, 2016

How to get to Warhammer World (International Travel)

Hi everyone,

A short while back, we had the chance to visit the UK.  And, of course, near top of our list of things to see during any free time while there was Warhammer World!

We're probably the last ones to figure it out what Warhammer World is (seems that pretty much everyone knows that Games Workshop has a sort of company store and model-museum in England).  But, in case you're in the same boat as us, here's a walk-through of how we made our way there....

(Link to the Warhammer World website)

Warhammer in London; 40K in London;
Our favorite Ork and Space Marine by London's Tower Bridge.

Step 1:  Get to England

In our case this was a business trip with a weekend in the middle.  If we were to do it again, we'd want to plan for more time - and arrange to take some models along.  In this case, we pretty much arrived in England empty-handed.

Flying was relatively painless.  And, the customs people were quite friendly.  1) They actually thought it was funny when we ("American" speakers) said we'd been working on our English.

Step 2:  Get to Nottingham.

Warhammer World is in Nottingham, UK.  And, pretty much right in the middle of Nottingham proper.  We had decided to avoid driving.  Would have cut down on the travel time - but our "drive on the left skills" aren't so great.  And anyway, if you can manage a train to Nottingham, you can find your way to Warhammer World.

You can see on the Google map search below that it's roughly a two-hour train ride to get there.  Not so bad.  And, we'll point out a few subtle points that we we stumbled upon as we went.... 

Here's a phone screen capture of the trek from London to Nottingham.  Didn't want to risk driving on the left - so working on a route by train.

To begin with, you need to make your way to Kings Cross station.  Pretty easy on the Tube.  We dropped in a handy reference photo for comparison (making sure you're in the right place).


And, depending upon your inclination - while at Kings Cross Station, if Harry Potter fits your liking, you can check out the large display and store arranged at Platform 9 3/4.


A quick hint about booking the train.  There are (at least) two different train routes to get there.  The faster, more direct one costs more.  The slower, less direct one costs less.

We used the slower one on the way there -- the faster one on the way back.

Only downside of the slower one is that you end up spending about 45 minutes waiting for a connection in the nice town of Grantham.

If you happen to be a train fanatic, that's like all good -- because the station in Grantham has lots of memorabilia about the speed run set by the Mallard.  If you're not particularly into trains, this delay might be frustrating....


The train schedule board at Kings Cross - showing our train to Leeds (we'd be getting off at Grantham and changing trains for Nottingham)

 And, our train arriving!

 And, we're on the train!!!  Here are our favorite Ork and Space Marine with our ticket on-board.  They were both very excited to be heading for a sort of "homecoming."  [Also, you'll notice on our ticket that it says "via Grantham" in little letters - that's where we switched trains.]

Arriving in Nottingham....  We saw that there were some failed buildings right by the station.  Not sure about how those came to be in Nottingham.  In the US this is what a failed factory building often looks like.  If that's it, here's hoping that everyone in Nottingham sees better times in the coming future.

It did strike us though that these buildings, though falling down, did look very much like 40K scenery buildings.  And, we wondered if they were in some part the source material for Games Workshop artists.


As we arrived in Nottingham, there were several buildings on the eastern side of the station which looked a bit like 40K scenery pieces.  Not sure of the circumstances for these old failed buildings - and very sorry if those circumstances were sad ones.  But, interesting to see how much the 40K crumbling buildings look like those in real-life.


More photos of the crumbling buildings....

Step 3:  Tram from main station

When you arrive in Nottingham, make your way out of the station - and then up onto the elevated tram platform.

[From the station, Google maps has it as a 30 minute walk.  It was a little cloudy when we were there - threatening some rain - so even though we had the time for a walk, we took the "NET Tram" tram.]

We were a little bit confused about which side of the street to stand on....  We ended up asking grandmother and grandson for help on which direction's train we needed in order to go "west" to Warhammer World.

Our phone indicated that we should take the "Toton Lane" tram -- ride for three stops to "Gregory Street."

That turned out to be exactly right :)  And, the cool thing is that we would see Games Workshop on the left as we arrived coming down a slight hill toward Gregory Street.

 Here's our phone map of the route from the Nottingham Station to the Gregory Street stop for Warhammer Work.

The tram stop has a very nice sign to let you know how long it'll be until the next tram.  As you can see here, they run quite often.

 For piece of mind -- here is the list of stops on the Toton Lane tram line.  Sure enough only three from Nottingham Station up to Gregory Street (Warhammer World's stop)

Here's another phone screen-shot showing the route :)
Step 4:  A short walk.  

The walk down the street is very nice.  On a Saturday it wasn't a very busy road.  Crossed a small bridge with boat canal going underneath....

And, then walked into the parking lot of Warhammer World :)


Walking from Gregory Street back to Warhammer World - crossing over a very nice canal!

Battlegaming One; How to get to Warhammer World; Walk to Warhammer World; Warhammer World Directions; WarhammerWorld Directions
A quick shot from our walk to Warhammer World

The good news is that you know pretty well when you've arrived.  You've got the Games Workshop logo on the building.  And, there are also the full scale Ultramarines tank in the parking lot in case the other big graphics on the building aren't enough to tell you that you've arrived!

And, Warhammer World itself -- was awesome :)  Highly recommend making your way there!!  We're already working on ways that we can visit again....


The Warhammer World building with large emblem!!


Ultramarine's tank on display at Warhammer World :)

Sunday, October 30, 2016

Armies on Parade - Crimson Fists Frigate, the Fist of Vengeance

Somewhere near Pythos in the Pandorax System....

"Supeem Warboss Fork -- pleez check dis!  Dey iz turnin' to ram us!"

Fork, the Supreme Warboss of the Yellow Orks turned to his Nav Boy's display; and focused on the blue craft on the image.  As its prow swung toward his Ork Hulk, Da Ruinin' Runcible, a huge grin dominated his expression.  "Lovely, dey IZ comin' righ' to us!"


Turning to, he bellowed, "Nav Boy!  All reactys to full!  All ahead frank!"  And, then drawing in an Ork lungful threw back his head with a full war-cry:  "Waaaaagh!"


Ork Hulk; Battlegaming One; Ork Hulk with Space Marine Frigate; Ork Hulk with Space Marines Ship
Fork and Spork's Hulk - Da Ruinin' Runcible - With Looted (Failed Ramming Victim) Crimson Fists Frigate as Background.

An Explanation:

Back in August when we ran the Ork Train at the Reno Summit Warhammer Store, Mr E, (the store warboss) challenged us to take part in the Armies on Parade event in October.

The problem, of course, was "how do you fit an Ork Train on a 2 foot x 2 foot base?  The answer we came up with was to use 3 dimensions.  After thinking of a while we had realized that if we created a model of the inside of Supreme Warbosses Fork and Spork's Hulk that we would have plenty of space for the train.

Yet, as we started thinking about how to create the hulk out of foam, we felt that it would be fun to have something in the background to give nice contrast to our Ork lootings.


Write-up Part I -- Creating a Crimson Fists Frigate to be part of our Ork Hulk :)

Our friend Mr. M has beaten us with his Crimson Fists enough times ("preferred enemy Orks" rings in our ears) that we needed a little bit of modeling revenge.  And, we chuckled a bit as we imagined what might take place if a hapless (and smallish) Crimson Fists Frigate should try to ram an Ork Hulk.

The Hulk would win in the crash of course -- and after spawning to make up for any losses in the hand-to-hand assault which would inveitbly result -- the Orks would loot the remaining hardware from the Frigate.

So, we thought that it would be fun to make at least one wall -- or section -- of a Crimson Fists Frigate as an incorporated part of our Armies on Parade display.

How to do it?

We spent some decent thought pondering how to integrate the Space Marine's Frigate.  And, finally went with using the wall of the frigate as a "background" for the section of the hulk.

 And, we figured we could make something pretty gothic looking if we used a set of the scenery building pieces.

Then, at the local Game Kastle's swap meet we found this:  And, if we split it apart, we figured it would make great pieces of a Frigate!

We were worried that it would look flat, though.  So, we had the idea of making it with two flat sections one sloping up; the other sloping down.  We noticed that lots of Battlefleet Gothic ships have that diamond-shaped cross section....

Our concept for the section of Space Marine Frigate.  2 feet wide, 2.5 feet tall.  Angled so that it looks a bit Gothic.  We were thinking to hold it against the "rock" of the Hulk using magnets....

So, we built a plywood frame....  Here is the back-side of it.  Two pieces of 1/4" plywood attached to 2x4 pieces which we trimmed on a band-saw to match the angle we wanted.

Here is our plywood frame.  We painted it grey.  Ran out of time to do anything more fancy.  Going forward, we'll coat it with plastic and create some "insides" of the frigate for the Orks to be looting....

Then we covered it with plastic....  We were wanting the surface to look like a space ship.  We knew that wood grain would be hard to cover up.  We plastic sheeting at Home Depot which looked nice.  Plus, the ribbed structure puts small ridges in it -- which end up looking a LOT like the welded hull of a ship.

Here is the plastic sheeting we used.  Pretty inexpensive at Home Depot.  Cuts very easily, etc....

Once we had covered our wooden frame with the plastic, we realized that this plastic was not super easy to glue to.  We tried plastic glue out.  Did not bond (just stayed as a liquid on the surface of the white sheet).  Since this is a very large structure, we were worried that super glue would not create a very elastic structure.  So, we did some quick testing....

Of course our old friend epoxy would certainly bond.  But, we didn't have a lot of time before the Armies on Parade event -- and we would be in trouble even with the 5 minute curing epoxies.

Luckily hot glue turns out to do a really super job of bonding 40K plastic to the white sheet material.  In the trial (below) we glued a tank turret piece on and could not budge it after 30 seconds!

Here is our gluing test.  Plastic glue didn't work.  Hot glue was great!  (And, hot glue was really fast -- certainly compared to epoxy!)

Well, at first we were thinking to build our Frigate out of pieces of Imperial Buildings -- such as some of the terrain sets.  Mr. E had pointed out that the windows on those have quite a "gothic appearance" - just like Battlefleet Gothic's Imperial ships.

However, when at the Game Kastle swap meet we spotted a cast-aside Fortress of Redemption we new we had found some better raw materials!

Here is the donor Fortress of Redemption.  Turned out to be much easier to take the turret sections apart than the tower itself....

Breaking the Fortress apart turned out to be pretty tricky.  In the end, we used hot water to weaken the glue bonds - and then pried things apart.  We ended up with all of the pieces intact (for the most part).

Then, we started trying some layouts....

Right away, we had the idea of using the building skirts along the bottom of the top portion of the Frigate.  Then we noticed that we had just enough of those skirds to put some right-side-up -- and another piece reversed.

Trying layouts of our pieces.  Part of what we tried to work out was anticipating where we would put a blast hole in the side of the Frigate.

After some trials fitting we started hot-gluing things down.  This is a good point to add that we ended up purchasing a little band-saw about a year back to help with another project.  That turned out to be HUGE for building the frigate.  We were able to carefully trim sections off of the Fortress's pieces with nice repeat-ability.  And, it really helped with the speed of construction.

Our trusty Ryobi mini-bandsaw in action.  Turned out to be extremely useful for trimming the pieces in a nice and straight fashion.

As we started gluing things down (and that's hot-gluing, mind you), we took a break and showed our progress to Mr. S at GameKastle.  He gave us several additional pieces of advice:  1) work on making sure that the Frigate doesn't look like bits glued to a board; 2) use the two color spray paint trick; 3) always work on building your narrative....

So, one thing we did was carve out the white plastic where we had placed access doors so that they looked realistically indented.  That did help a little bit with the appearance.  The biggest factor though (in hind-sight) was deciding to make the Frigate's walls out of two angled pieces.  It still allowed us to have a wall at 90-degrees to the Hulk's shell -- but created more interesting internal angles for viewing.

Here is the Fist of Vengeance with most of the components glued.  Still some work to go on the cargo bay....

Part of the grand plan was to have the Fist of Vengeance in a condition where it had *just recently* rammed the Orks' Hulk - and the Orks were gearing up their looting efforts.  So, one idea was to create a cargo bay at the bottom.

We found a plastic salad container (from Trader Joe's grocery store) which looked pretty good as a cargo bay.  Then we added bay doors slid most of the way open.


Then, we started priming everything black as Mr. S had instructed.

We have most of the black primer on.  Turned out using 2 cans of black primer for this project!!  Got the cargo bay doors fashioned at this point - ready to prime again :)

We didn't want the Frigate to look perfect - so we were planning for a blast hole on the upper left portion.  We used a "hole saw" to cut a hole in the wood behind the plastic.  Then used a heat gun to melt away the plastic surface.

We did this after we had put on our Space Marine blue coat from the top angle -- and Alien Purple from the underneath angle.  So, we primed the blasted hole black again.  And, this ended up creating a nice "charred" look!

Here is our blaster hole - thanks to our heat gun!!  Mr. S had suggested that a heat gun held nice and steady up close to plastic would have a nice effect - and sure enough!  What we did was heat it up and then poke it with a screwdriver to make it look "blown inward."

For the final painting, we decided to keep things simple.  We used some nice red to paint a few accent items -- such as the Crimson Fists logo and the ship name.  Decided to also paint the ribbons on the large side-of-ship statues as well.

40K Size BFG
Here is The Fist with the red painting done....  Also, have the cargo bay put together....

And, lastly, we used magnets and washers to mount guns onto the turrets.  We decided that any good Space Marine's Frigate would be sporting weapons like Plasma Obliterators -- so we borrowed our Ultramaries Obliterator for this mission.  :)

And, here it is with the turret-guns magnet mounted.

Crimson Fists Frigate; Crimson Fists Ship; Space Marines Ship; Model of Imperial Ship
And, here is the finished Fist of Vengeance!

So, that's the story of building the Fist of Vengeance Frigate section for our Hulk.

More writing to come -- we'll write-up building the rest of the Ork Hulk.

And, of course, much more work to be done.  Ideas at this point:
- Build internals for the frigate on the reverse side of the model!
- More painting?  Although we liked how this ended up a bit muted for a background piece
- Add Orks and Grots working the surface over.  (That IS the reason the "F" is bent on the "OF" in Fist of Vengance -- we'll have a grot pulling it off.)

And, not really sure what to do about the fact that the Crimson Fists seemed to have used a pretty unconventional spelling of "Vengance".  For now, we'll keep it.  Fork and Spork are enjoying the humor of Space Marines spelling something the way Orks would do it!


Wednesday, August 24, 2016

Custom Dice! (Wasn't as hard as we thought!)

 Hi everyone,  

Custom dice....  Playing at events or conventions, we've ended up with a few souvenir custom dice here and there.  Also, we've seen people playing with Space Marine dice when playing Warhammer 40K.  

Thinking about that -- and, while gearing up for playing 40K with our Ork Looted Train at Warhammer The Summit -- we were thinking how cool it would be to have more of the Green/Pink dice to go with Spork's Pink Orkies :)  [We figured the one Green/Pink die we'd found must have been a custom run somewhere.]  

We had found this single die -- perfect for Spork's Pink Ork Army.  We were trying to figure out where we could find more.  No luck so far....

We had gotten the Green/Pink D6 at Kublakon about a year back.  And, thought (maybe??) we got it from the Chessex stand there.  

So, we started out by doing some checking of the internet to see if we could find a way to order more.... Nope -- none of the websites seem to have the Green/Pink type.  

So, we started digging deeper - and when we found the e-mail for Chessex (figured we'd ask them directly) we stumbled upon the spot on their website which mentions custom dice.  

Custom Dice !! ?? !!  

Giving that some thought, it struck us....  "Wouldn't it be cool to be playing Pathfinder with one's Pharasma Oracle -- and have Pharasma symbols on the "6" side of the dice?" 

So, we took the image we had created in Windows Paint to 3-D print our Pharasma tokens.  (Here's a link to that adventure!)  And, e-mailed them to very friendly Chessex team....  (And, we also asked about Green/Pink dice, too.)
 
Here is the Pharasma symbol we had created in Microsoft Paint - coloring in the blue and yellow tinted one so that we had a monochromatic version....

Responses from Chessex:  

- No - they didn't make Green/Pink dice  
- But, Yes :) they'd be happy to make D6's with our graphic.  And, they even sent us a rendering of how the dice would look.  Said it would take 4-6 weeks - and at a price of about $1 per die we wanted created that way.
 
Pretty amazing that this is a rendering!  The Chessex team sent this to us very quickly after we sent our e-mail of the Pharasma image....

So, we placed our order.  And, right on time (just over 4 weeks), we got a very nice box in the mail from Chessex with the dice inside!!!  You can see for yourself - they look just like the rendering Chessex had sent us!  

The happy box from Chessex!  Pharasma dice inside!

And, of course we had to give them a try.  Did a lot of rolling.  They seem to be just as random as any other six sided dice.  (There was a brief moment of worry that the Pharasma-swirl might not come up as often as a normal "6 dots" on a d6.  Not to worry - they seem to work just fine.)

Here are our custom Pharasma dice along with our Pharasma tokens....